how to convert automatic transmission to manual

Converting from automatic to manual transmissions is a complex undertaking, gaining popularity among car enthusiasts seeking enhanced driving control and engagement․
Numerous online communities, like Acura TL Enthusiasts on Facebook, demonstrate significant interest in this modification, though costs vary widely․
The process involves substantial mechanical work, requiring careful planning and execution, as evidenced by discussions on platforms like Reddit and E46 Fanatics․
Overview of the Conversion Process
The conversion fundamentally involves removing the existing automatic transmission, its associated components (torque converter, flexplate), and installing a manual transmission, clutch, flywheel, and pedal assembly․
Significant modifications are often needed for the driveshaft, shifter linkage, and wiring harness․
Resources like YouTube tutorials (referenced source) illustrate the mechanical aspects, while forums highlight the challenges of sourcing compatible parts and addressing electronic control unit (ECU) adjustments․
Careful attention to detail is crucial throughout each stage․
Why Convert? Benefits of a Manual Transmission
Enthusiasts often pursue manual swaps for a more connected driving experience, offering greater control over gear selection and engine braking․ Manual transmissions generally provide improved fuel efficiency and potentially increased performance․
The desire for a manual option, when unavailable in a specific vehicle model (as noted in the Acura TL forum), is a primary motivator․
It’s about driver engagement and a purist approach to motoring․
Assessing Vehicle Compatibility
Determining compatibility is crucial; not all vehicles are suitable for manual swaps․ Thorough research into parts availability and potential modifications is essential before starting․
Identifying Suitable Vehicles for Swaps
Vehicle selection significantly impacts swap feasibility․ Models with existing manual transmission counterparts simplify the process, offering readily available parts․ Platforms like E46 Fanatics highlight the challenges when manual versions are scarce, driving up costs․ Consider the vehicle’s chassis, engine layout, and available space for components․ Some swaps are more straightforward than others, depending on the car’s original design and the complexity of the conversion․
Researching Parts Availability
Thorough parts research is crucial before commencing a swap; Online forums, such as Acura TL Enthusiasts, reveal difficulties locating manual transmission components for specific vehicles․ Identify sources for the transmission itself, clutch assembly, pedal box, and potentially a modified driveshaft․ Scouring online marketplaces and salvage yards can uncover necessary parts, but compatibility must be verified․
Essential Parts Required for the Swap
A successful conversion demands a manual transmission, clutch kit, pedal assembly, driveshaft modifications, and potentially a new flywheel․ Sourcing these components is vital for completion․
Transmission and Related Components
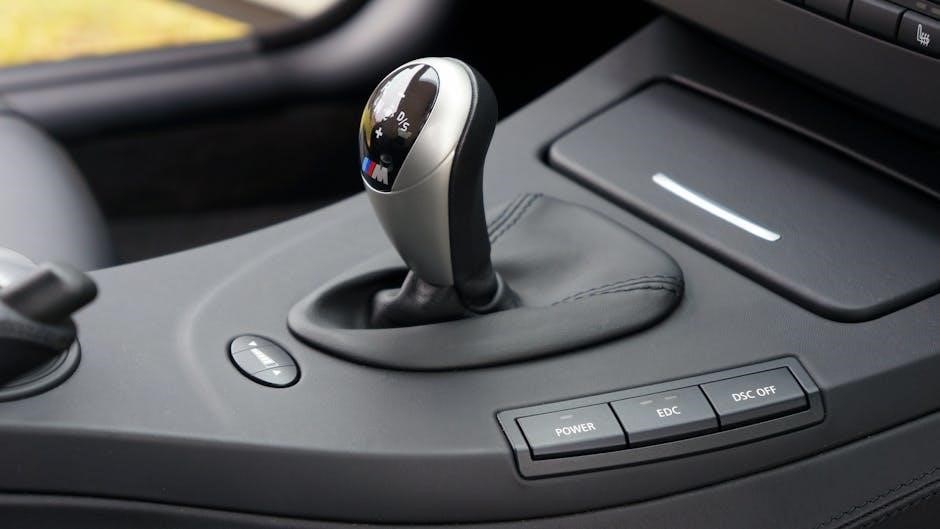
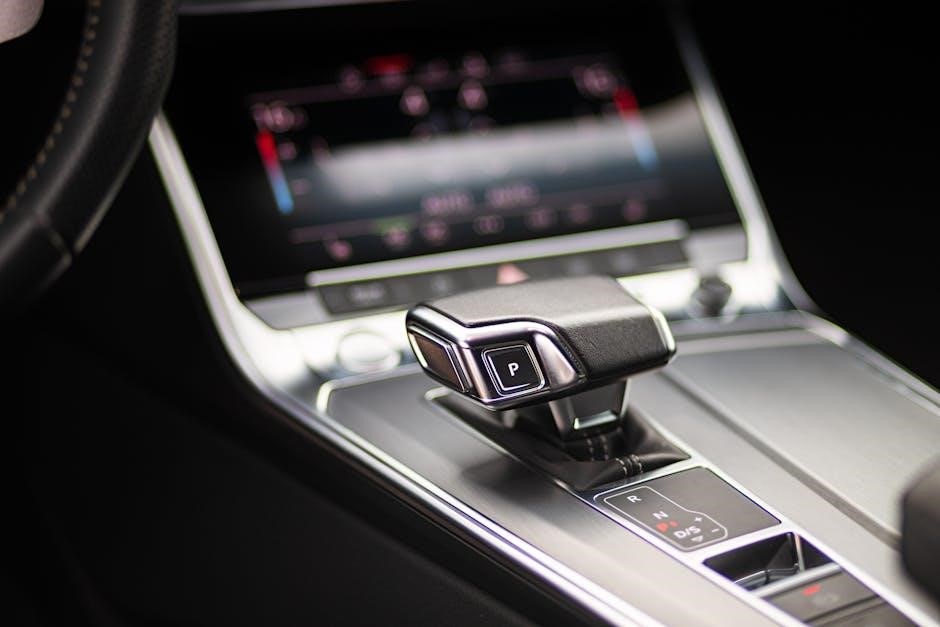
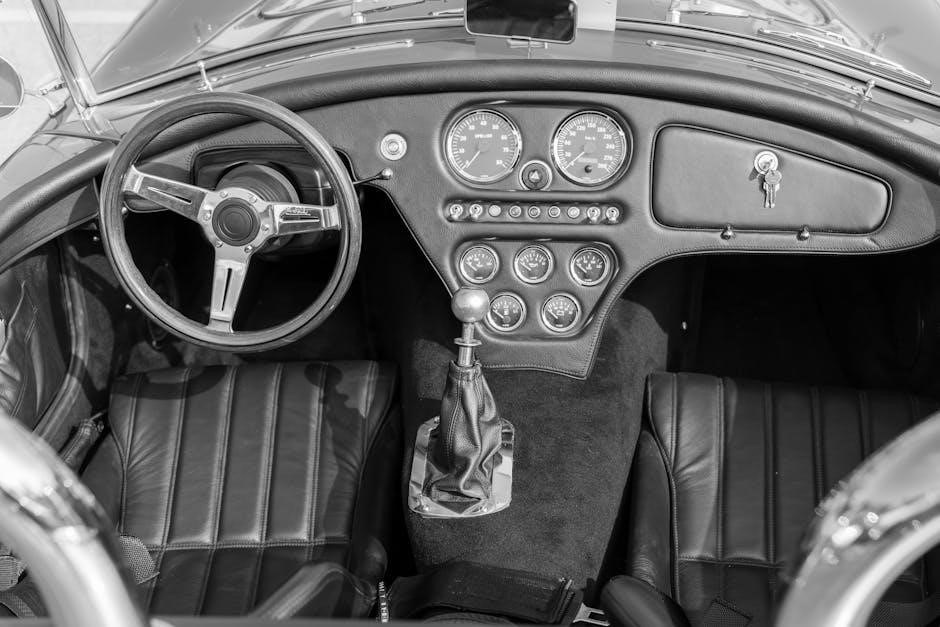
The core of the swap is, naturally, the manual transmission itself, requiring careful selection for vehicle compatibility․ A complete clutch kit – including the disc, pressure plate, and throw-out bearing – is essential for proper operation․ Don’t forget the flywheel, often needing replacement or resurfacing․ Additionally, a transmission crossmember designed for a manual may be necessary, alongside a new shifter and associated linkage for precise gear changes․
Pedal Assembly and Clutch System
A crucial step involves installing a manual brake and clutch pedal assembly, often requiring fabrication or sourcing a complete unit from a donor vehicle․ The clutch master cylinder and slave cylinder are vital for hydraulic clutch actuation․ Proper brake lines are needed, and bleeding the system is essential․ Careful attention to pedal positioning ensures comfortable and effective operation․
Driveshaft and Linkage Modifications
Adapting the driveshaft is often necessary due to differing lengths between automatic and manual transmission setups; custom fabrication or shortening may be required․ Precise shifter linkage installation is paramount for accurate gear selection․ This includes the shift knob, linkage rods, and potentially a transmission crossmember adjustment for proper alignment․

Tools and Equipment Needed
Essential tools include jack stands, wrenches, sockets, a torque wrench, and potentially welding equipment for bracket modifications․ Specialized tools for transmission removal are also crucial for success․
Specialized Tools for Transmission Removal
Successfully removing an automatic transmission necessitates specific tools beyond a standard socket set․ A transmission jack is paramount, safely supporting the weight during removal and installation․ Furthermore, a harmonic balancer puller may be required, alongside various adapters for securing the transmission․
Consider investing in a slide hammer for stubborn components and potentially a flywheel locking tool to prevent engine rotation during clutch installation․ These specialized tools streamline the process, minimizing damage and ensuring a smoother conversion․
Welding and Fabrication Equipment
Depending on the vehicle and swap kit, welding may be essential for modifications to the transmission tunnel or pedal assembly mounting․ A MIG or TIG welder offers versatility for various metal types․ Additionally, a plasma cutter proves invaluable for precise metal removal and shaping during fabrication․
Essential safety gear, including a welding helmet, gloves, and fire-resistant clothing, is non-negotiable․ Metal fabrication skills are crucial for adapting components and ensuring a secure, structurally sound conversion․
Step-by-Step Conversion Guide
Begin by safely removing the automatic transmission, followed by meticulous installation of the manual counterpart․ Wiring and linkage adjustments are critical for proper function and a smooth driving experience․
Removing the Automatic Transmission
First, disconnect the battery to prevent electrical shorts․ Support the vehicle securely with jack stands – safety is paramount! Drain all transmission fluid before disconnecting driveshaft, linkages, and electrical connectors․ Carefully unbolt the transmission, supporting its weight during removal․ Expect tight spaces and potentially rusted bolts, requiring penetrating oil and patience․ Proper labeling of wires and components is crucial for reassembly, ensuring a smooth transition to the manual setup․
Installing the Manual Transmission
Begin by aligning the manual transmission with the engine, carefully guiding it into position – a transmission jack is highly recommended․ Securely bolt the transmission to the engine, ensuring proper torque specifications are followed․ Reconnect all driveshaft components, linkages, and electrical connectors, referencing labeled diagrams․ Install the clutch assembly, verifying correct alignment․ Double-check all connections before proceeding, as errors can lead to significant issues․
Wiring and Electronic Considerations
Address the vehicle’s electronic systems, as automatic and manual setups differ significantly․ Disable or remove automatic transmission-related sensors and modules․ Install necessary wiring for the clutch switch, reverse lights, and potentially a speed sensor․ Carefully review wiring diagrams to avoid shorts or malfunctions․ Consider ECU reprogramming to optimize performance and eliminate error codes related to the removed automatic components․

Cost Breakdown of the Conversion
Expect significant expenses, encompassing parts like the transmission, clutch, and pedal assembly․ Labor costs can dramatically increase the total, while unforeseen issues may arise․
Parts Costs: Transmission, Clutch, Pedals
Transmission costs fluctuate greatly depending on the vehicle and condition, potentially ranging from $500 to $3000 or more․ A new clutch kit, including the disc, pressure plate, and throw-out bearing, typically costs between $200 and $800․ Pedal assemblies, often requiring sourcing used parts, can add another $100 to $500 to the budget․ These figures are estimates, and sourcing used components can reduce overall expenses․
Labor Costs (If Applicable)
Professional installation can significantly increase the overall cost, with labor rates varying widely by location and shop expertise․ Expect to pay between $800 and $2500 for a complete conversion, depending on vehicle complexity․ DIY installation saves on labor but requires substantial mechanical skill and time․ Considering the complexity, professional help is often recommended for those lacking experience․
Potential Unexpected Expenses
Unexpected costs frequently arise during manual transmission swaps․ Broken bolts, damaged wiring harnesses, and the need for custom fabrication are common culprits․ Budget an additional 10-20% of the estimated total for unforeseen issues․ Sourcing rare or discontinued parts can also inflate expenses, as noted in enthusiast forums․ Thorough inspection and preparation are crucial to minimize surprises․

Common Challenges and Solutions
Compatibility issues and wiring problems are frequent hurdles․ Online forums offer invaluable guidance, while professional services can tackle complex electrical or fabrication needs effectively․
Finding Compatible Parts
Sourcing the correct components presents a significant challenge, as noted by inquiries on platforms like Facebook’s Acura TL Enthusiasts group, where finding manual transmission models is difficult․ Parts must match the vehicle’s year, make, and model precisely․
This often involves extensive research, potentially utilizing online forums and specialized parts suppliers․ Expect to locate not only the transmission itself, but also the clutch, flywheel, pedal assembly, and potentially a modified driveshaft․
Dealing with Wiring Issues
Wiring modifications are frequently a hurdle during automatic-to-manual swaps, requiring careful attention to detail․ The automatic transmission’s wiring harness will need to be adapted or replaced to accommodate the manual system․ This includes addressing signals for the gear selector, reverse lights, and potentially the vehicle’s computer․
Incorrect wiring can lead to malfunctions, so thorough research and potentially professional assistance are crucial․
Post-Conversion Adjustments and Testing
After the swap, precise clutch adjustment and bleeding are vital for optimal performance․ Thoroughly check transmission fluid levels and test drive to confirm smooth shifting and operation․
Clutch Adjustment and Bleeding
Proper clutch adjustment is paramount for a smooth and reliable driving experience post-swap․ Begin by ensuring the clutch pedal has the correct free play, typically around 0․5 to 1 inch․
Next, bleeding the hydraulic clutch system is crucial to remove any air bubbles, guaranteeing firm pedal feel and consistent engagement․
Follow the manufacturer’s recommended bleeding procedure, starting with the slave cylinder and working towards the master cylinder, until clear fluid emerges․
Transmission Fluid Level Check
After installing the manual transmission, verifying the fluid level is essential for optimal performance and longevity․ Locate the fill plug on the transmission casing and carefully remove it․
With the vehicle on a level surface, add the manufacturer-specified gear oil until it reaches the fill hole, ensuring not to overfill․
Replace the plug securely, and routinely check the level during subsequent maintenance intervals․
Legal and Insurance Implications
Modifying a vehicle with a transmission swap may necessitate adherence to local vehicle regulations and potential inspections․
Informing your insurance provider is crucial, as modifications can impact coverage and premiums․
Vehicle Modification Regulations
Before undertaking a transmission swap, thoroughly research your local and state vehicle modification regulations․ Some jurisdictions require inspections to ensure the modification meets safety standards and doesn’t compromise vehicle integrity․ These regulations can vary significantly, impacting legality and potential fines․ Documentation of the swap, including parts used and installation details, is often recommended․ Failure to comply with these rules could lead to issues during vehicle registration or roadside inspections, potentially rendering the vehicle illegal to operate on public roads․
Insurance Coverage After the Swap
Notify your insurance provider immediately after completing the automatic-to-manual transmission swap․ Modifications like this can affect your vehicle’s value and risk profile, potentially altering your premium․ Failure to disclose the change could invalidate your coverage in the event of an accident․ Be prepared to provide documentation proving the modification was performed correctly and meets safety standards, ensuring continued, comprehensive insurance protection․
Resources and Communities
Online forums, such as E46 Fanatics and Acura TL Enthusiasts on Facebook, offer valuable support and guidance․ YouTube provides visual tutorials, aiding the conversion process․
Online Forums and Groups
Dedicated online communities are invaluable resources for those contemplating an automatic to manual transmission swap․ Platforms like Facebook groups (e․g․, Acura TL Enthusiasts) provide spaces to ask questions, share experiences, and learn from others who have completed similar conversions․
E46 Fanatics exemplifies a forum where enthusiasts discuss costs and challenges․ While Reddit (NSX forum) can offer insights, access may sometimes be restricted․ These groups foster collaboration and provide a wealth of practical knowledge․
Professional Conversion Services
For those lacking the expertise or time for a DIY automatic-to-manual swap, professional conversion services offer a viable alternative․ These specialized shops possess the necessary skills, tools, and experience to execute the conversion efficiently and correctly․
While potentially more expensive than a self-performed swap, professional services minimize the risk of errors and ensure a reliable outcome․ Researching reputable shops with proven track records is crucial for a successful conversion․

Safety Precautions During the Swap
Prioritize safety by disconnecting the battery and utilizing proper lifting techniques with secure jack stands․ This prevents electrical hazards and supports the vehicle safely during the process;
Disconnecting the Battery
Before commencing any work on your vehicle’s electrical system during the automatic to manual swap, completely disconnect the negative battery terminal․ This crucial step prevents accidental short circuits and potential damage to sensitive electronic components․ Ensure the terminal is securely insulated after removal․
Always remember that working with automotive electrical systems can be dangerous, and disconnecting the battery is a fundamental safety precaution․ It minimizes the risk of sparks, shocks, and damage to the vehicle’s computer systems․
Proper Lifting and Support Techniques
Safely lifting and supporting the vehicle is paramount during transmission removal and installation․ Always use jack stands rated for the vehicle’s weight, positioned on designated reinforced areas of the chassis․ Never work under a vehicle supported only by a jack․
Employ a transmission jack for controlled lowering and raising of the transmission itself, preventing strain and potential injury․ Ensure the vehicle is on a level surface before lifting, and chock the rear wheels for added security․
Long-Term Maintenance Considerations
Regular clutch inspections and fluid changes are vital post-swap․ Monitoring clutch wear and maintaining proper transmission fluid levels ensure longevity and optimal performance of the manual system․
Clutch Wear and Replacement
Post-conversion, clutch lifespan depends heavily on driving habits․ Aggressive driving, frequent stop-and-go traffic, and performance applications accelerate wear․ Symptoms of a failing clutch include slippage, difficulty shifting, and a spongy pedal feel․
Regular inspection is crucial; anticipate replacement every 30,000-60,000 miles, though this is variable․
Budgeting for clutch replacement is a prudent long-term maintenance consideration․
Transmission Fluid Changes
Unlike automatic transmissions, manual transmissions require less frequent fluid changes, but it remains vital for longevity․ Typically, fluid should be replaced every 30,000 to 60,000 miles, depending on driving conditions and manufacturer recommendations․
Using the correct fluid type is critical; consult your vehicle’s manual․ Regular changes prevent wear and ensure smooth shifting performance․
Alternatives to a Full Swap
For those hesitant about a complete swap, shift kits enhance automatic performance, while paddle shifters or manual modes offer some control without extensive modification․
Shift Kits for Automatic Transmissions
Shift kits represent a more affordable and less invasive alternative to a full automatic-to-manual conversion․ These kits modify the hydraulic pressure within the automatic transmission, resulting in firmer, more precise shifts․ They don’t offer the complete driver control of a manual, but they can significantly improve responsiveness and feel․
While discussions regarding full swaps dominate forums like Acura TL Enthusiasts and E46 Fanatics, shift kits provide a performance boost without the complexity․ They are a good option for those wanting a sportier driving experience without undertaking a major mechanical overhaul․
Paddle Shifters and Manual Mode Options
Modern automatic transmissions often include manual mode functionality and paddle shifters, offering a compromise between convenience and control․ These systems allow drivers to select gears sequentially, mimicking a manual transmission experience without a clutch pedal or gear lever․
Though not a true manual swap, this provides increased driver engagement․ Online discussions, while focused on complete conversions, rarely mention these as viable alternatives, but they represent a simpler, less costly path to enhanced control․