honeywell pro 6000 thermostat installation manual
Honeywell Pro 6000 Thermostat Installation: A Comprehensive Guide
This guide details the installation of the Honeywell Pro 6000 series, covering wiring, mounting, and setup. It ensures efficient heating and cooling system operation.
The Honeywell Pro 6000 thermostat represents a significant advancement in home comfort control. This programmable thermostat, part of the FocusPRO series, offers precise temperature management and energy savings. Installation requires a basic understanding of HVAC systems and electrical wiring. This guide provides step-by-step instructions for a successful installation, covering everything from wallplate mounting to system testing;
Proper installation ensures optimal performance and access to advanced features like compressor protection and adaptive recovery. Refer to the included parts list to verify all components are present before beginning.
Understanding the FocusPRO 6000 Series
The Honeywell FocusPRO 6000 series offers programmable control for both heating and cooling systems. These thermostats are designed for compatibility with conventional and heat pump systems, providing flexible installation options. Key features include a user-friendly interface, precise temperature regulation, and energy-saving programming capabilities.
Understanding the specific model (TH6000, TH6110D, TH6220D, TH6320U) is crucial, as wiring configurations may vary slightly. This series prioritizes ease of use for both installers and homeowners, enhancing overall comfort and efficiency.
Package Contents and Parts Identification
Upon opening the package, verify all components are present. This includes the thermostat unit itself, a wallplate for mounting, mounting screws and anchors, wire labels for easy identification, and this installation manual. Key parts are the battery holder (Part No. 50007072-001) and the cover plate assembly (Part No. 50002883-001).
Carefully inspect each item for any damage. Proper identification of these parts before installation streamlines the process and ensures a secure, functional setup.

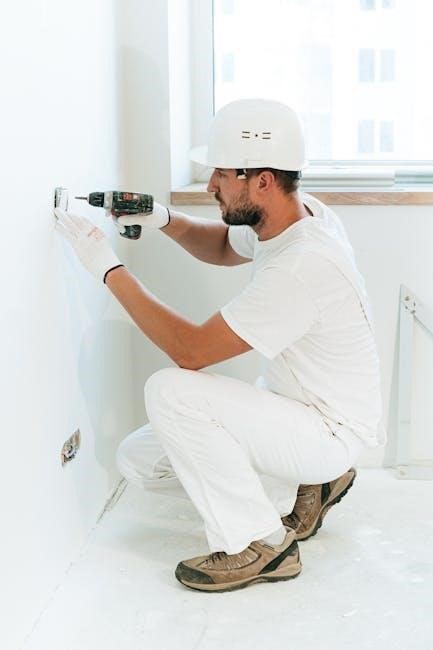
Wallplate Installation
Begin by selecting a suitable location for the thermostat, away from direct sunlight or drafts. Ensure the chosen spot is near existing wiring. Once selected, use the provided screws and anchors to securely mount the wallplate to the wall. Leveling is crucial for proper thermostat function.

Take care during mounting to avoid damaging existing wiring. A firmly attached wallplate provides a stable base for the thermostat and ensures reliable connectivity.
Mounting the Wallplate
Carefully position the wallplate on the desired location, utilizing a level to guarantee straight installation. Mark the screw holes with a pencil for accurate drilling. If drilling into drywall, use the supplied anchors for secure mounting.
Securely fasten the wallplate using the provided screws, ensuring it’s flush against the wall; Avoid over-tightening, which could damage the wall or the wallplate itself. A properly mounted wallplate is fundamental for a stable thermostat installation.
Wiring Terminal Designations
Understanding terminal designations is crucial for correct wiring. ‘R’ typically denotes 24VAC power, while ‘C’ is the common wire, essential for consistent power. ‘W’ controls heating, ‘Y’ cooling, and ‘G’ the fan. Heat pump systems utilize additional terminals like ‘O/B’ for reversing valve control and ‘Aux’ for auxiliary heat.
Refer to your system’s wiring diagram and the thermostat manual. Incorrect wiring can damage your HVAC system; double-check all connections before proceeding. Proper identification ensures optimal functionality.
Wiring Conventional Systems
Conventional systems, utilizing separate heating and cooling, require straightforward wiring. Connect the ‘R’ wire to the 24VAC power source and ‘C’ to common. The ‘W’ terminal connects to the heating system, initiating heat when activated; ‘Y’ connects to the cooling system, enabling cooling operation. Finally, ‘G’ controls the fan, circulating air throughout the system.
Ensure power is OFF during wiring. Double-check connections against your system’s wiring diagram for accurate and safe installation. Incorrect wiring can lead to system malfunction.
Connecting to Heating Systems
For gas, oil, or electric heating, connect the ‘W’ wire to the heating system’s control board. This wire signals the furnace or heating element to activate; Verify the voltage compatibility between the thermostat and the heating system – typically 24VAC. Proper connection ensures reliable heat initiation when the thermostat calls for it.
Always disconnect power before wiring. Incorrect ‘W’ wire placement can cause heating system failure or damage. Consult your heating system’s manual for specific wiring instructions.
Connecting to Cooling Systems
To connect to a cooling system, utilize the ‘Y’ wire, linking the thermostat to the air conditioner or heat pump’s compressor control. Ensure the ‘G’ wire is connected to the fan control for proper airflow during cooling cycles. Verify 24VAC compatibility between the thermostat and cooling unit.
Double-check wiring before restoring power. Incorrect ‘Y’ or ‘G’ wire connections can lead to compressor damage or inefficient cooling. Refer to your cooling system’s documentation for precise wiring guidance.
Wiring Heat Pump Systems
Heat pump wiring differs from conventional systems, requiring careful attention to wire designations. The ‘O’ and ‘B’ wires are crucial for reversing valve control and auxiliary heat activation. ‘Y’ controls the compressor, and ‘G’ manages the fan. Proper configuration is vital for efficient heating and cooling.
Incorrect wiring can damage the heat pump or result in improper operation. Always consult the heat pump’s wiring diagram and the thermostat’s compatibility chart before connecting any wires. Verify voltage requirements for optimal performance.
Heat Pump Wiring Configurations
Several heat pump wiring configurations exist, depending on the system’s design. Common setups include standard heat pumps, dual-fuel systems, and those with auxiliary heat. The ‘O/B’ terminal is configurable for either reversing valve or auxiliary heat control.
Carefully identify the wire functions based on the existing wiring and the heat pump’s documentation. Incorrectly assigning wires can lead to system malfunctions. Ensure the thermostat’s settings match the wiring configuration for optimal performance and efficiency.
Auxiliary Heat Wiring

Auxiliary heat wiring is crucial for maintaining comfort during extremely cold temperatures. Typically, the auxiliary heat is wired to the ‘AUX’ or ‘E’ terminal on the thermostat. This provides supplemental heating when the heat pump cannot meet the demand.
Proper configuration ensures seamless transition between heat pump and auxiliary heat. Verify the auxiliary heat source’s voltage requirements and ensure compatibility with the thermostat. Incorrect wiring can damage the auxiliary heat system or prevent it from functioning correctly.
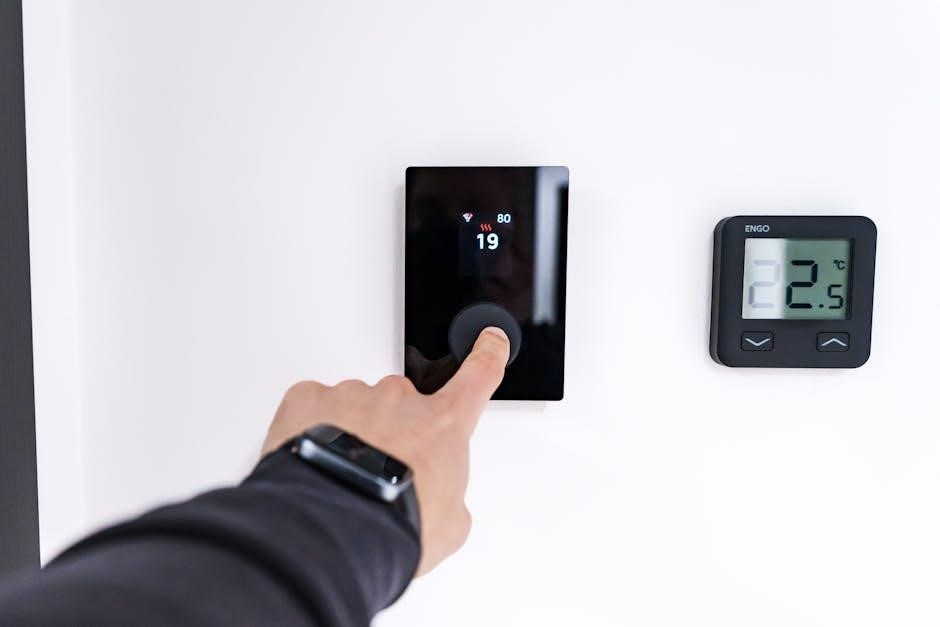
Thermostat Mounting
Securely mounting the thermostat is essential for reliable operation and a clean appearance. After wiring, carefully align the thermostat body with the installed wallplate. Gently push the thermostat onto the wallplate until it clicks into place, ensuring a firm and stable connection.
Verify the thermostat is flush against the wall and doesn’t wobble. A loose connection can cause intermittent operation or inaccurate temperature readings; Double-check all wiring connections before proceeding to system testing.
Attaching the Thermostat to the Wallplate
Once wiring is confirmed, carefully align the thermostat with the wallplate. Ensure the wiring harness isn’t pinched or stressed during this process. Gently but firmly press the thermostat body onto the wallplate; you should hear a distinct click indicating a secure connection.
Inspect the fit, confirming the thermostat sits flush against the wall without any gaps. A proper fit ensures stable operation and prevents potential wiring issues. Avoid excessive force, which could damage the unit or wallplate.

Ensuring Secure Connection
After attaching the thermostat, gently tug on it to verify a firm connection to the wallplate. It should not loosen or detach with reasonable force. A secure connection is vital for reliable communication between the thermostat and the heating/cooling system.
Double-check all wiring connections at the wallplate, ensuring each wire remains firmly seated in its designated terminal. Loose connections can cause intermittent operation or system failures. A stable connection guarantees accurate temperature readings and control.
Installer System Test

Following wiring, a thorough system test is crucial. Power on the HVAC system and cycle through heating and cooling modes via the thermostat. Verify that the correct functions activate – warm air for heating, cool air for cooling. Listen for proper operation of the furnace and air conditioner.
Address any discrepancies immediately. If a mode fails to activate, re-examine the wiring connections. Most problems can be corrected quickly and easily with careful inspection and adjustment. A successful test confirms correct installation.
Running the System Check
To initiate the system check, set the thermostat to “Heat” and raise the temperature several degrees above the room temperature. Confirm the furnace ignites and warm air flows. Then, switch to “Cool” and lower the temperature below room temperature; verify the air conditioner activates and cool air is delivered.
Observe each cycle completely. Note any unusual noises or delays. If issues arise, consult the troubleshooting section or Honeywell Customer Care for assistance. A complete system check ensures optimal performance.
Troubleshooting Common Wiring Issues
If the thermostat lacks power, double-check the AC power connection and battery installation. For incorrect temperature readings, ensure proper thermostat placement, away from direct sunlight or drafts. Verify wiring connections at both the thermostat and furnace/air handler, referencing the wiring diagram.
Loose wires are a frequent cause of problems. If issues persist, consult a qualified HVAC technician. Incorrect wiring can damage the system; always prioritize safety and accuracy during installation.
Special Function Settings
The Honeywell Pro 6000 offers advanced features like compressor protection, safeguarding the cooling system from short-cycling. Adaptive Intelligent Recovery learns heating/cooling patterns to optimize comfort and energy savings. Access these settings via the installer setup menu (Option 12 must be enabled).
Proper configuration of these functions enhances system performance and longevity. Refer to the detailed manual for specific parameter adjustments and optimal settings for your HVAC system.
Configuring Compressor Protection
Compressor protection prevents short-cycling, extending the lifespan of your air conditioning unit. This feature delays compressor restarts after a shutdown, typically set between 5-minute intervals. Access this setting within the installer setup menu, ensuring Option 12 is enabled for advanced features.
Adjusting the cycle time depends on your system’s specifications; consult your HVAC professional for optimal settings. Incorrect configuration may impact cooling efficiency or negate the protection benefits.
Adaptive Intelligent Recovery Setup
Adaptive Intelligent Recovery learns your heating and cooling system’s characteristics to optimize comfort and energy savings. This feature anticipates the time needed to reach your desired temperature, initiating operation earlier for precise temperature control.
Enable this function via the installer setup menu (Option 12 must be set to ‘1’). The thermostat intelligently adjusts, minimizing temperature swings and maximizing efficiency. Proper setup ensures consistent comfort without wasted energy.
Battery Installation and Replacement
The Honeywell Pro 6000 requires battery power for operation, even with AC power connected. A “REPLACE BATTERY” warning indicates low power, flashing on the display. Use two AA alkaline batteries (Part No. 50007072-001).
To install, access the battery compartment and observe correct polarity. Replace batteries promptly to avoid loss of settings or functionality. Regular checks prevent unexpected thermostat shutdowns and maintain consistent climate control.
Battery Type and Specifications
The Honeywell Pro 6000 thermostat specifically requires two AA alkaline batteries for optimal performance and longevity. Avoid using rechargeable, lithium, or heavy-duty batteries, as they may damage the device or reduce its operational lifespan.
Ensure the batteries are fresh and installed with the correct polarity, as indicated within the battery compartment. Using the specified battery type guarantees reliable operation and prevents potential issues with thermostat functionality and accuracy.

Low Battery Warning and Resolution
A flashing “REPLACE BATTERY” warning on the thermostat display indicates low battery power. This doesn’t immediately affect operation, as the thermostat can also run on AC power when installed. However, prompt battery replacement is crucial to avoid potential system interruptions.
To resolve this, carefully open the battery compartment and replace both AA alkaline batteries with fresh ones, ensuring correct polarity. The warning should disappear after the new batteries are installed and the thermostat restarts.
Navigating the Installer Setup Menu
Accessing the installer setup is essential for customizing advanced thermostat features. To enter, press and hold the ‘Menu’ button until the display changes. Then, repeatedly press ‘Next’ to scroll through the options until ‘Option 12’ appears on the screen. This menu allows for configuration of specific system parameters.
Understanding these options is key to optimizing performance. Remember to consult the full installation manual for detailed explanations of each setting before making any changes.
Accessing Option 12
To reach Option 12, begin by entering the installer setup menu. Press ‘Menu’ repeatedly until you navigate to ‘Option 12’ on the thermostat display. Utilize the ‘Next’ button to cycle through the available options. Once ‘Option 12’ is highlighted, press the down arrow to modify its current setting. This crucial step unlocks advanced features.
Confirm your selection by pressing ‘Menu’ again to save the new configuration. Remember the default setting is often ‘0’, and changing it to ‘1’ enables specific functionalities.
Changing Option 12 to Enable Features
After accessing Option 12, modify its value to ‘1’ to activate enhanced functionalities. The default setting of ‘0’ typically disables these features. Use the down arrow button on your Honeywell Pro 6000 to toggle the value. Confirm your selection by pressing the ‘Menu’ button.
This change unlocks compatibility with advanced system configurations, potentially improving performance and control. Ensure you understand the implications before altering this setting.
Electrical Ratings and Specifications
The Honeywell Pro 6000 thermostat operates on 24VAC, ensuring compatibility with standard HVAC systems. It’s crucial to verify your system’s voltage before installation. The thermostat’s operational temperature range is typically 32°F to 104°F (0°C to 40°C), suitable for most indoor environments.
Proper voltage is essential for reliable performance and preventing damage. Always disconnect power before wiring. Refer to the detailed specifications in the installation manual for precise ratings.
Voltage Requirements
The Honeywell Pro 6000 thermostat is designed to operate with a 24VAC (Volts Alternating Current) power source. This low-voltage system is standard for most residential heating and cooling setups. Do not connect the thermostat to a higher voltage, as this could cause severe damage and void the warranty.
Confirm your HVAC system provides 24VAC before proceeding with the wiring. Incorrect voltage can lead to malfunction or safety hazards. Always disconnect power at the breaker before installation.
Temperature Range
The Honeywell Pro 6000 thermostat is engineered to accurately manage temperatures within a broad operational range. It effectively controls systems from approximately 40°F to 90°F (4.4°C to 32.2°C) for heating, and 50°F to 90°F (10°C to 32.2°C) for cooling.
Optimal performance is achieved within these limits. Temperatures outside this range may result in reduced accuracy or system inefficiency. Ensure your home’s ambient temperature falls within the specified range for reliable operation.
Troubleshooting Common Problems
If your Honeywell Pro 6000 thermostat isn’t functioning correctly, several quick checks can resolve the issue. For “No Power,” verify AC power is connected and the battery isn’t depleted – a flashing “REPLACE BATTERY” warning indicates this.
Incorrect temperature readings often stem from improper placement or calibration. Most problems are easily corrected; consult the manual or Honeywell Customer Care for assistance if issues persist.
No Power to Thermostat
A lack of power to the Honeywell Pro 6000 typically indicates a problem with the power source. First, confirm AC power is consistently supplied to the thermostat. If using batteries as a backup, a flashing “REPLACE BATTERY” warning signifies depleted batteries needing immediate replacement.
Ensure the battery holder (Part No. 50007072-001) is correctly installed and the batteries are fresh. Verify all wiring connections are secure to prevent intermittent power loss.
Incorrect Temperature Readings
If the Honeywell Pro 6000 displays inaccurate temperatures, several factors could be at play. Ensure the thermostat isn’t directly exposed to sunlight, drafts, or heat-generating appliances, as these influence readings. Confirm proper airflow around the unit isn’t obstructed by furniture or curtains.
Verify correct wiring, especially for systems with outdoor sensors. Recalibrate the thermostat through the installer setup menu if discrepancies persist, following the manual’s instructions for temperature offset adjustments.
Understanding Error Codes
The Honeywell Pro 6000 utilizes error codes to diagnose system issues. These codes appear on the thermostat display, signaling problems with wiring, sensor functionality, or internal components. Refer to the installation manual’s dedicated error code section for a comprehensive list and their meanings.
Decoding these messages is crucial for effective troubleshooting. Common codes relate to low battery power, communication failures, or heating/cooling system malfunctions. Addressing the identified issue often resolves the error and restores normal operation.
Decoding Thermostat Displays
The Honeywell Pro 6000’s display communicates vital system information. Beyond temperature settings, it presents error codes, operational status, and warnings like “REPLACE BATTERY.” Understanding these indicators is key to diagnosing issues. A flashing display often signals a problem requiring attention, such as a wiring fault or sensor malfunction.
Familiarize yourself with the display’s symbols and messages. The manual provides a detailed explanation of each, enabling quick identification of potential problems and facilitating efficient troubleshooting before contacting customer care.
Resolving Error Messages
When error messages appear on your Honeywell Pro 6000, consult the manual’s troubleshooting section. Most issues can be resolved quickly. Common problems include wiring errors, power supply issues, or sensor failures. Begin by verifying the power source and wiring connections at the wallplate.
If the error persists, refer to the specific error code’s explanation. The manual details steps for each code, guiding you through potential fixes. Don’t hesitate to contact Honeywell Customer Care for assistance if you’re unable to resolve the issue.
Honeywell Home Trademark Information
The Honeywell Home trademark is a valuable asset, utilized under license from Honeywell International Inc. This signifies a commitment to quality and innovation in home comfort solutions. Honeywell maintains strict standards for products bearing this trademark, ensuring reliability and performance.
Using products with the Honeywell Home mark guarantees adherence to these established benchmarks. It represents a legacy of engineering excellence and a dedication to customer satisfaction within the smart home technology sector.
Warranty Information
Honeywell warrants this FocusPRO 6000 thermostat against defects in materials and workmanship for a specified period from the date of purchase. This warranty covers repair or replacement of the defective product, at Honeywell’s discretion.
To obtain warranty service, proof of purchase is required. The warranty does not cover damage caused by improper installation, misuse, or neglect. See the full warranty details included with your product for complete terms and conditions;
Contacting Honeywell Customer Care
For assistance with your Honeywell FocusPRO 6000 thermostat, or if you encounter difficulties during installation or operation, Honeywell Customer Care is available to help. You can reach them through various channels for support and troubleshooting.
Visit the Honeywell Home website for FAQs, support documentation, and contact information. Alternatively, call their dedicated customer care line for direct assistance from a trained representative. Prompt support ensures a seamless experience.