amp research power step instructions
AMP Research Power Steps revolutionize truck accessibility, offering automated deployment and retraction for effortless entry and exit. These steps blend seamlessly with your vehicle’s aesthetic, providing both convenience and a modern upgrade.
What are AMP Research Power Steps?
AMP Research Power Steps are motorized, retractable steps designed to enhance vehicle accessibility, particularly for trucks and SUVs. Unlike traditional fixed steps, these deploy automatically when a door opens and retract when closed, offering a clean, streamlined appearance. They feature robust construction, utilizing high-strength aluminum and stainless steel components for durability and longevity.
These steps aren’t merely an aesthetic upgrade; they significantly improve entry and exit, especially for passengers of varying heights or those with mobility challenges. Integrated LED lighting provides added visibility and safety during nighttime use, making them a practical and stylish addition to any vehicle.
Benefits of Installing Power Steps
Installing AMP Research Power Steps delivers numerous advantages, starting with enhanced accessibility for all passengers. They eliminate the struggle of climbing into lifted trucks or SUVs, improving safety and convenience. The automatic deployment and retraction provide a clean, factory-like appearance when not in use, preserving vehicle aesthetics.
Beyond convenience, these steps increase vehicle value and offer improved visibility thanks to integrated LED lighting. Durable construction ensures long-lasting performance, while simplified installation makes the upgrade relatively straightforward. They represent a significant improvement over traditional steps, offering both form and function.
Vehicle Compatibility
AMP Research Power Steps boast broad vehicle compatibility, spanning numerous truck and SUV models. However, confirming fitment is crucial before purchase. Compatibility depends on the year, make, and model of your vehicle, as well as cab configuration (regular, extended, or crew cab).
AMP Research provides a comprehensive online lookup tool on their website, allowing users to input vehicle details for accurate fitment information. Some models may require specific mounting brackets or adapters, sold separately. Always verify compatibility to ensure a seamless installation and optimal performance of your new power steps.

Pre-Installation Preparation
Thorough preparation is key for a smooth installation. Gather necessary tools, verify all parts are present, and prioritize safety by disconnecting the vehicle’s battery.
Tools Required for Installation
Successful installation demands the right tools. You’ll need a standard socket set, including extensions and various sizes, alongside an adjustable wrench for flexible fitting. A torque wrench is crucial for securing bolts to the manufacturer’s specifications, preventing damage.
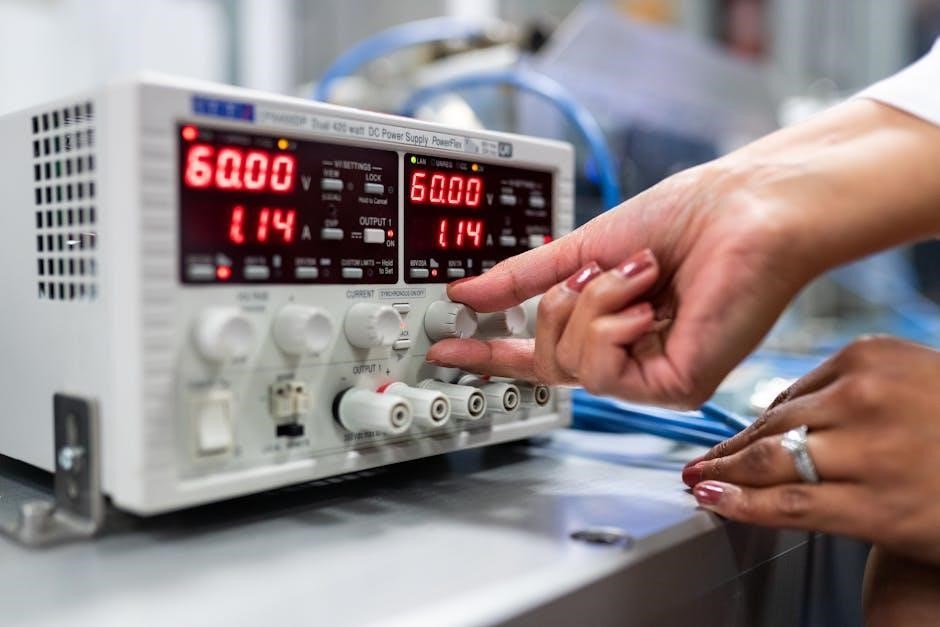
Essential additions include a drill with a selection of bits for mounting brackets, wire strippers and crimpers for electrical connections, and a multimeter to verify voltage. Safety glasses are paramount, alongside work gloves for hand protection. A flashlight illuminates dark areas, and zip ties neatly manage wiring harnesses.
Parts List and Verification
Before commencing, meticulously verify all components against the parts list. This typically includes the power step assemblies (left and right), mounting brackets tailored to your vehicle, wiring harnesses, and the control module.
Inspect for any shipping damage – dents, scratches, or missing parts. Confirm the presence of all necessary hardware: bolts, nuts, washers, and connectors; The kit should also contain detailed installation instructions. Cross-reference the included parts with the manual to ensure completeness. Document any discrepancies immediately with the supplier to avoid delays during installation.
Safety Precautions
Prioritize safety throughout the installation process. Disconnect the vehicle’s negative battery terminal to prevent electrical shorts and damage to the vehicle’s electrical system. Wear safety glasses to protect your eyes from debris;
Utilize jack stands to securely support the vehicle if lifting is required – never work under a vehicle supported only by a jack. Be mindful of pinch points during bracket installation and step assembly. Follow torque specifications precisely when tightening bolts to avoid over-tightening or loosening. If unsure, consult a qualified mechanic.

Installation Process — Wiring
Connect the power step wiring to the vehicle’s designated harness, ensuring secure and waterproof connections. Route wires carefully, avoiding heat sources and moving parts.
Locating the Vehicle’s Wiring Harness
Identifying the correct wiring harness is crucial for a successful installation. Consult your vehicle’s owner’s manual or a dedicated wiring diagram to pinpoint the necessary connections. Typically, the harness will be located beneath the dashboard, near the kick panel, or within the vehicle’s electrical center.
Look for a bundle of wires with corresponding connectors that match the AMP Research power step wiring harness. Carefully examine wire colors and functions to ensure accurate connections. Disconnect the vehicle’s battery before proceeding to prevent electrical shorts and damage. Proper identification avoids costly errors and ensures optimal system performance.
Connecting the Power Step Wiring
Carefully connect the AMP Research power step wiring to the vehicle’s harness, matching wire colors and functions precisely. Utilize the provided connectors or solder and heat-shrink tubing for secure, weatherproof connections. Ensure each connection is firm and properly seated to prevent intermittent operation or shorts.
Double-check all connections against the wiring diagram before proceeding. Avoid excessive strain on the wires during installation. A properly connected wiring harness is vital for reliable power step functionality and prevents potential electrical issues within the vehicle’s system.
Wiring Harness Routing and Securing
Route the wiring harness along existing vehicle wiring paths, avoiding sharp bends, hot components (like the exhaust), and moving parts. Secure the harness using the provided clips or zip ties, ensuring it doesn’t dangle or rub against the chassis. Maintain sufficient slack to accommodate suspension movement and prevent wire damage.
Proper routing protects the wiring from abrasion, heat, and physical impact, ensuring long-term reliability. Regularly inspect the harness for wear or damage. A well-secured harness contributes to safe and consistent operation of the power steps.

Installation Process ‒ Mounting Brackets
Mounting brackets are crucial for secure step attachment. Align them precisely with factory mounting locations, utilizing provided hardware for a stable and reliable foundation.
Identifying Mounting Points
Precisely locating the correct mounting points is paramount for a successful installation. Consult your vehicle-specific instructions, as locations vary significantly between makes and models. Typically, these points reside on the vehicle’s rocker panels, often utilizing existing factory holes.
Carefully examine the undercarriage, comparing it to the diagrams provided in the installation manual. Ensure the chosen points are structurally sound and capable of supporting the weight of the steps and occupants. Incorrect mounting can compromise safety and step functionality, so double-check before proceeding.
Attaching the Mounting Brackets
With mounting points identified, begin attaching the brackets using the hardware provided. Ensure proper alignment with pre-drilled holes, utilizing washers and bolts as specified in the manual. Tighten the hardware initially by hand, then progressively with a torque wrench to the manufacturer’s recommended specification.
Avoid over-tightening, which could damage the vehicle’s frame or the brackets themselves. Double-check bracket stability after tightening, ensuring they are securely fastened and exhibit no wobble. Proper bracket attachment is crucial for the steps’ long-term durability and safe operation.
Ensuring Proper Bracket Alignment
Precise bracket alignment is paramount for smooth power step operation and preventing binding. Utilize a level to verify each bracket is perfectly horizontal and vertical relative to the vehicle’s frame. Measure diagonally across each bracket to confirm squareness; discrepancies indicate misalignment needing correction.
Slight adjustments can be made by loosening the mounting bolts and gently repositioning the bracket. Retighten bolts after each adjustment, rechecking alignment. Misaligned brackets can cause uneven step extension, motor strain, and premature wear, so meticulous attention to detail is essential.

Installation Process — Step Assembly
Step assembly involves attaching the motor, linking the steps, and fine-tuning height and angle for optimal performance and a secure, customized fit.
Attaching the Power Step Motor
Securely mounting the power step motor is crucial for reliable operation. Begin by aligning the motor with the designated bracket on the step assembly, ensuring proper orientation as indicated in the manual. Utilize the provided hardware – typically bolts and washers – and tighten them to the manufacturer’s specified torque.
Double-check that the motor is firmly affixed, preventing any wobble or movement during operation. Incorrect motor attachment can lead to premature wear, operational issues, or even complete failure. Pay close attention to wiring connections during this stage, ensuring they are neatly routed and protected from potential damage.
Connecting the Step Linkage
Proper linkage connection is vital for synchronized step movement. Carefully attach the linkage rods to both the motor arm and the step platform, utilizing the supplied pins and clips. Ensure a snug fit, but avoid over-tightening, which could restrict motion. Verify that each linkage component moves freely without binding or obstruction.
Double-check all connections before proceeding, as incorrect linkage can cause uneven step deployment or retraction. Refer to the diagram in your installation manual for precise linkage routing. A correctly assembled linkage system guarantees smooth, reliable operation and extends the lifespan of your AMP Research Power Steps.
Adjusting Step Height and Angle
Fine-tuning the step’s position ensures optimal comfort and ground clearance. Utilize the adjustment bolts located on the motor assembly to modify the step’s height and angle. Small adjustments can significantly impact usability, so proceed incrementally. Observe the step’s deployment and retraction in relation to your vehicle’s rocker panels.
Aim for a slight downward angle to facilitate easy entry and exit. Avoid excessive height, which could create a steep climb, or a low position that might scrape on uneven terrain. Securely tighten the adjustment bolts once the desired height and angle are achieved, verifying stability before full operation.

Post-Installation Checks & Calibration
Thorough testing confirms proper operation after installation. Calibrate the system following the manufacturer’s guide, ensuring smooth extension, retraction, and obstacle detection functionality.
Testing Step Operation
Begin with a visual inspection, confirming all connections are secure and no wiring is pinched or exposed. Cycle the ignition on and off, observing the steps’ response – they should deploy and retract smoothly; Test with passengers of varying weights to ensure consistent performance.
Manually attempt to override the system, verifying the steps can be controlled independently. Check for any unusual noises during operation, indicating potential mechanical issues. Finally, confirm the obstacle detection feature functions correctly by introducing a minor obstruction during deployment.
Calibrating the System
Calibration ensures optimal performance and safety of your AMP Research Power Steps. Access the calibration mode through the vehicle’s infotainment system or a dedicated control module, as outlined in your vehicle’s manual. Follow the on-screen prompts to establish the “home” position – fully retracted.
Adjust sensitivity settings for obstacle detection to prevent unintended retraction. Verify proper step height and angle alignment. Save the calibration settings and re-test operation with varying loads to confirm accuracy and responsiveness. Repeat if necessary for fine-tuning.
Checking for Interference
Post-installation, thoroughly inspect for potential interference with surrounding components. Ensure the power step mechanisms don’t obstruct exhaust systems, suspension travel, or undercarriage wiring. Verify ample clearance during full extension and retraction cycles.
Pay close attention to brake lines, fuel lines, and any aftermarket accessories. Confirm wiring harnesses are securely routed and shielded to prevent signal disruption. Address any identified conflicts immediately to avoid damage or operational issues. A visual and functional check is crucial for long-term reliability.
Troubleshooting Common Issues
Diagnosing problems with AMP Research Power Steps often involves checking power connections, linkage adjustments, and motor functionality. Systematic testing isolates the root cause efficiently.
Steps Not Extending/Retracting
If your Power Steps aren’t deploying or retracting, begin by verifying the system receives power. Check the inline fuse and wiring connections at the control module – ensure they are secure and undamaged. Inspect the step linkage for obstructions or binding; sometimes debris interferes with smooth operation. A faulty motor is another potential culprit, requiring testing with a multimeter.
Confirm the vehicle’s door trigger signals are reaching the control module correctly. If these checks don’t resolve the issue, consult the AMP Research troubleshooting guide for specific error codes or consider professional assistance for a more in-depth diagnosis.
Wiring Connection Problems
Addressing wiring issues is crucial for Power Step functionality. Begin by meticulously inspecting all connections – at the control module, step motors, and vehicle’s wiring harness. Look for corrosion, loose connectors, or damaged wires. Use dielectric grease on connections to prevent future corrosion. A multimeter can verify voltage at key points, confirming power delivery.
Ensure proper grounding; a poor ground can cause erratic behavior. If you find damaged wiring, repair or replace it using appropriately sized wire and connectors. Always disconnect the battery before working with electrical components to prevent shorts.
Motor Malfunctions
Diagnosing motor issues requires a systematic approach. First, confirm the motor receives power and ground during operation. Listen for unusual noises – grinding or clicking – indicating internal damage. Check the motor’s wiring harness for breaks or shorts. If the motor fails to respond, consider testing with a known good motor (if possible) to isolate the problem.
Internal motor failures often necessitate replacement. Contact AMP Research for authorized repair options or replacement motors. Avoid attempting internal repairs unless you possess specialized knowledge and tools.

Maintenance and Care
Regular cleaning and lubrication are crucial for optimal performance. Inspect steps for debris, and lubricate linkage points as needed to ensure smooth, reliable operation.
Cleaning the Power Steps
Maintaining cleanliness extends the lifespan and ensures smooth operation of your AMP Research Power Steps. Regularly wash the steps with mild soap and water, avoiding harsh chemicals or abrasive cleaners that could damage the finish. A soft brush can effectively remove dirt and grime from the step surface and linkage components.
Pay close attention to the areas where the steps retract into the vehicle, as these tend to accumulate more debris. Rinse thoroughly after washing, and dry completely to prevent corrosion. Inspect for any signs of damage during cleaning, addressing issues promptly to avoid further complications. Consistent cleaning contributes to long-term reliability.
Lubrication Points
Proper lubrication is crucial for maintaining the smooth and quiet operation of your AMP Research Power Steps. Focus on the step linkage points, applying a lithium-based grease to ensure free movement and prevent binding. The pivot points of the step arms also require periodic greasing, as does the motor drive mechanism.
Avoid over-lubrication, as excess grease can attract dirt and debris. Use a grease gun for precise application, and wipe away any excess. Regularly inspect these points during maintenance, and re-apply lubricant as needed, typically every six months or as dictated by usage.
Inspection Schedule
Regular inspections are vital for the longevity of your AMP Research Power Steps. Monthly, visually check all mounting brackets and hardware for tightness, ensuring no loosening has occurred due to vibration. Quarterly, inspect the wiring harness for any signs of damage, chafing, or corrosion.
Annually, perform a thorough lubrication of all pivot points and linkages. Also, test the step operation multiple times, verifying smooth extension and retraction. Address any unusual noises or delays promptly. A consistent inspection schedule prevents minor issues from escalating into costly repairs, maximizing your investment.

Advanced Features & Customization
Unlock personalized control with remote integration, adjustable lighting, and customizable step settings for height and angle, enhancing both functionality and style.
Remote Control Integration
Seamlessly integrate your AMP Research Power Steps with existing remote start or aftermarket systems for ultimate convenience. Many vehicle-specific kits offer plug-and-play compatibility, simplifying the installation process. Utilizing a dedicated remote fob allows independent control of the steps, extending or retracting them without needing to open the vehicle doors. This feature is particularly useful in tight parking spaces or when carrying loads. Explore options for wireless control modules that connect to your smartphone via Bluetooth, providing a modern and customizable user experience. Ensure compatibility with your vehicle’s electrical system before installation.
Lighting Options
Enhance visibility and style with integrated LED lighting options for your AMP Research Power Steps. Many models feature built-in white or amber LEDs that illuminate the step surface when deployed, improving safety during nighttime entry and exit. Some systems allow for customizable lighting modes, including pulsing or solid illumination. Explore aftermarket LED kits for a wider range of color options and brightness levels. Proper wiring and weatherproofing are crucial for reliable operation. Consider adding lighting to the mounting brackets for increased visibility and a premium aesthetic. Always follow manufacturer guidelines during installation.
Customizable Step Settings
AMP Research power steps often include adjustable settings to personalize operation. Users can typically modify the step deployment speed, tailoring it to their preference. Height adjustments are also possible, ensuring optimal step positioning for various vehicle lift kits or tire sizes. Some advanced systems offer tilt angle customization for enhanced comfort. Explore the control module interface for these options, often accessible through a smartphone app or vehicle’s infotainment system. Remember to save your preferred settings for consistent performance. Proper calibration is key to maximizing customization benefits.